Horseshoe Tarot Spread: 7-Position Progression & Outcome Pivots
A 7-card kinetic arc mapping your situation from past catalyst to probable outcome, with actionable advice to shift the central apex obstacle.
You're Not Lost. You're Listening.
Your intuition led you here. Let's see what the cards want you to know.
One profound reading daily • No signup • Save your insights with a free account
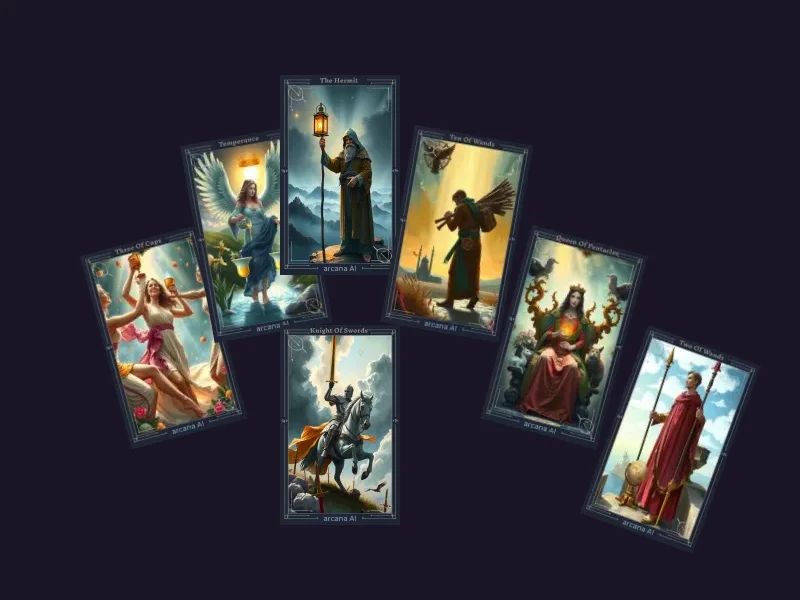
Spread Layout: 7 card(s)
Card Positions
Past Foundation
The historical catalyst, unexamined habit, or foundational event that set current momentum in motion.
Present Situation
The active energetic baseline and immediate circumstances surrounding you right now.
Hidden Influences
Subconscious drives, unspoken agendas, or invisible forces operating beneath your conscious awareness.
The Apex Obstacle
The central crux and primary friction point of your reading, anchoring the turning point of the entire arc.
External Environment
Social dynamics, outside opinions, market conditions, or factors outside your direct control.
Actionable Strategy
Direct tactical counsel on the behavior, attitude, or boundary needed to find the apex obstacle.
Probable Outcome
The projected trajectory and natural resolution if you maintain your present course and apply the advised action.
The Kinetic Arc of Experience
When situations become complicated, short three-card spreads often leave out needed contextual elements like external social pressures or subconscious blind spots. At the same time, shuffling into a ten-card Celtic Cross can introduce so many moving parts that you spend more time untangling contradictory symbols than taking decisive action.
The Horseshoe Spread bridges this divide. By laying seven cards along an ascending and descending curve, it creates a kinetic narrative arc.
You begin at the base with foundational causes, climb through immediate circumstances and hidden dynamics, confront the central apex obstacle at the peak, and descend through external environmental context and tactical advice to reach a grounded outcome.
                         ┌───────────────┐
                         │   [ Pos 4 ]   │
                         │   The Apex    │
                         │   Obstacle    │
                         └───────┬───────┘
                                 │
                 ┌───────────────┴───────────────┐
                 │                               │
         ┌───────┴───────┐               ┌───────┴───────┐
         │   [ Pos 3 ]   │               │   [ Pos 5 ]   │
         │    Hidden     │               │   External    │
         │  Influences   │               │  Environment  │
         └───────┬───────┘               └───────┬───────┘
                 │                               │
         ┌───────┴───────┐               ┌───────┴───────┐
         │   [ Pos 2 ]   │               │   [ Pos 6 ]   │
         │    Present    │               │  Actionable   │
         │   Situation   │               │   Strategy    │
         └───────┬───────┘               └───────┬───────┘
                 │                               │
         ┌───────┴───────┐               ┌───────┴───────┐
         │   [ Pos 1 ]   │               │   [ Pos 7 ]   │
         │     Past      │               │   Probable    │
         │  Foundation   │               │    Outcome    │
         └───────────────┘               └───────────────┘
          (Ascending Wing)                (Descending Wing)
Detailed Breakdown of the 7 Stations
The horseshoe naturally segments into three distinct phases: the diagnostic climb (Cards 1 through 3), the apex fulcrum (Card 4), and the strategic resolution (Cards 5 through 7).
1. Position 1: Past Foundation (The Root Catalyst)
This card points to the historical root that set your current momentum into motion. It is not necessarily ancient history; rather, it emphasizes the specific decision, relationship contract, or emotional wound from the recent past that created the baseline you stand on today.
2. Position 2: Present Situation (The Active Baseline)
Position 2 reveals your current operational state. It cuts through rationalizations and shows the tangible reality of your dilemma. Notice whether the energy feels active or stagnant, and check how smoothly it builds on the past foundation in Card 1.
3. Position 3: Hidden Influences (The Blind Spot)
Operating directly beneath your conscious awareness, Position 3 brings forward what you are not factoring into your calculations:
- Subconscious avoidance patterns or fear of failure.
- Another party’s unstated motives or unspoken resentment.
- Subtle shifts in team morale, market timing, or emotional contracts.
Comparing Card 3 with Card 2 explains why situations often feel confusing despite your best conscious efforts.
4. Position 4: The Apex Obstacle (The Central Fulcrum)
Sitting at the physical peak of the layout, Card 4 represents the heart of your challenge. It is the crux of the reading. Everything on the ascending wing leads up to this obstacle; everything on the descending wing depends on how you handle it.
Do not view Card 4 with dread. It is diagnostic clarity, showing exactly where clinging to control, avoiding conflict, or resisting reality is costing you peace.
5. Position 5: External Environment (Circumstances & Others)
Position 5 looks outside your personal sphere. It reflects the people around you, societal climate, workplace politics, or economic trends that you cannot directly control. This card reminds you to distinguish between your internal issues and external circumstances you simply must find.
6. Position 6: Actionable Strategy (The Tactical Lever)
This card gives you direct counsel on the mindset, behavioral posture, or boundary needed right now. It provides the medicine to soothe the apex obstacle in Card 4. Whether it calls for ruthless intellectual clarity (Swords), steady patience (Pentacles), vulnerable communication (Cups), or bold initiation (Wands), Card 6 is your active leverage point.
7. Position 7: Probable Outcome (The Projected Horizon)
Position 7 synthesizes the trajectory of the entire arc. It shows where your current path leads if you continue your momentum and implement the strategic counsel from Card 6. Remember that tarot outcomes represent probabilistic trajectories, not carved-in-stone destiny.
The Fulcrum and Lever Technique
The real power of the Horseshoe Spread lies in understanding how Card 4 (The Obstacle) and Card 6 (The Action) work together to pivot Card 7 (The Outcome).
     [ Card 4: Obstacle ]  ◄── What stands in the way
              ▲
              │ Unlocked by
              │
     [ Card 6: Action ]    ◄── The tactical lever you control
              │
              ▼ Transforms
     [ Card 7: Outcome ]   ◄── The resulting future reality
When interpreting the reading:
- Look directly from Card 4 to Card 6: Does the advised action confront or heal the central obstacle? For example, if Card 4 is the Nine of Swords (paralyzing anxiety) and Card 6 is the Queen of Swords (objective, boundary-enforcing logic), the guidance is to stop treating catastrophic assumptions as facts and demand verified evidence.
- Observe how applying Card 6 alters Card 7: If Card 7 shows the Four of Wands (stability and shared celebration), taking the clear boundary stance in Card 6 is what makes that stability possible.
Cross-Pairing Analysis: Wing-to-Wing Dialogues
Once you have read the cards sequentially from 1 to 7, step back and examine the horizontal pairings across the two wings of the horseshoe. These mirrored pairs reveal subtle, overarching patterns:
| Mirrored Pair | Thematic Dynamic | Analytical Question |
|---|---|---|
| Card 1 & Card 7 | Past Foundation vs. Future Outcome | Are you evolving past your past conditioning, or are you about to recreate the exact same cycle in a different outfit? |
| Card 2 & Card 6 | Present Reality vs. Advised Action | How drastically does the advised strategy differ from what you are currently doing? If Card 2 is passive and Card 6 is active, you need to break inertia. |
| Card 3 & Card 5 | Subconscious Influence vs. External Environment | Is your internal anxiety matching external reality, or are you projecting personal fears onto people who are actually neutral? |
Horseshoe vs. Celtic Cross: Choosing the Right Tool
| Feature | The Horseshoe Spread (7 Cards) | The Celtic Cross (10 Cards) |
|---|---|---|
| Structure | Kinetic single arc (ascending and descending). | Two-part structure (small cross + vertical staff). |
| Best For | Clear situational progressions, project roadmaps, and decision milestones. | Existential life questions, complex psychological audits, and long-term karmic inquiries. |
| Cognitive Load | Moderate. Easy to synthesize in one fifteen-minute session. | High. Requires tracking complex intersections, hopes/fears, and multiple time horizons. |
| Actionability | High. Directly isolates the central obstacle and its tactical solution. | Broad. Delivers rich philosophical depth that can sometimes delay practical action. |
Conducting a Horseshoe Reading Step-by-Step
- Clarify your inquiry: Avoid vague questions like “What is my destiny?” Instead ask: “What dynamic is governing this transition, and how can I find the primary obstacle?”
- Lay the cards in an arc: Place Cards 1 through 3 curving upward on the left, set Card 4 at the highest point in the center, and curve Cards 5 through 7 downward on the right.
- Walk the kinetic climb: Read Cards 1 through 3 to understand how you arrived at this moment.
- Examine the apex fulcrum: Study Card 4 deeply. Identify the exact nature of the resistance.
- Evaluate context and action: Read Card 5 for outside conditions, then study Card 6 as your primary lever.
- Synthesize the outcome: Read Card 7 through the lens of Card 6’s counsel. Write down one concrete real-world action to execute within forty-eight hours.
The Horseshoe Spread provides clarity without clutter. By organizing seven cards into an intentional narrative arc, it illuminates the path from where you started to where you want to go.
Example Questions
- Where is this complex situation heading, and what action should I take?
- What hidden factor is creating the primary obstacle in my career?
- How can I resolve the central friction in this relationship?
- What external influences am I failing to account for?
- How can I shift the projected outcome of this project?
Related Spreads
Celtic Cross Tarot Spread: 10-Card Layout & Guide | Arcana AI
The classic 10-card tarot layout providing deep diagnostic insight. Explores conscious and subconscious forces, external conditions, and potential outcomes.
Decision-Making Tarot Spread: 5-Card Crossroads Layout
A strategic five-card layout for handling life's crossroads and making informed decisions. Explores your current situation, available paths, potential outcomes, and the best course of action.
Five-Card Tarot Spread: Cross Geometry & Elemental Balance
A versatile five-card layout bridging simple draws and complex spreads. Explore cross geometry versus linear timelines and master elemental balance audits.
Nine Card Tarot Spread: 3x3 Grid Layout & Guide | Arcana AI
A structured 3x3 grid layout mapping past, present, and future across material, emotional, and intellectual dimensions for holistic guidance.
Try This Spread
Experience this spread with Arcana AI
Get the AppFrequently Asked Questions
Why is the Horseshoe Spread considered an alternative to the Celtic Cross?
The 7-card Horseshoe provides comparable depth, covering past, present, subconscious, obstacles, environment, advice, and outcome, without the structural overcrowding of the 10-card Celtic Cross. It preserves a clear, kinetic arc that is easier to synthesize.
What makes Position 4 (The Apex Obstacle) so critical in this spread?
Position 4 sits at the physical and conceptual summit of the horseshoe arc. It is the fulcrum where past momentum meets future consequence. Resolving the card at Position 4 is the necessary breakthrough that unlocks the favorable outcome at Position 7.
Can the outcome card in Position 7 be changed?
Yes. Tarot outcomes reflect probabilistic momentum based on current trajectories. Position 6 (Actionable Strategy) exists specifically as the tactical lever you can use to modify or avert the outcome shown in Position 7.
Should the horseshoe be laid out facing open-end up or open-end down?
Both orientations work. An open-end up layout (U-shape) represents receiving wisdom and containment, while an arch layout (open-end down) symbolizes passing through a gateway. The card sequence (1 through 7) and interpretive meanings remain identical regardless of curvature.